Are you ready to take your pickleball skills to the next level? Look no further than a homemade practice wall—a game-changer for solo training.
Building an affordable and convenient pickleball practice wall can greatly enhance your abilities and provide a dedicated space to refine your techniques.
In this article, we’ll explore the benefits of a practice wall, how to choose the right one, and guide you through the process of creating your very own pickleball practice wall. Get ready to maximize your practice sessions and elevate your pickleball game like never before.
Do Not Forget to Read: Overall Best Pickleball Paddles
How to Build a Pickleball Practice Wall:
One of the most effective tools for solo practice is a pickleball practice wall or rebounder. A practice wall allows you to work on your game independently, improving hand-eye coordination, swing technique, and overall gameplay.
Choosing the Right Location
Before diving into the construction process, it is essential to choose the right location for your pickleball practice wall. Consider the available space in your backyard or any other suitable area where you can set up the wall.
Make sure there are no obstacles nearby that could hinder your practice. A clear and open space is ideal for an uninterrupted practice session.
Ideal Dimensions for a Practice Wall
The ideal dimensions for a pickleball practice wall are 10 feet wide and 6 feet high. This size provides ample space to practice various shots and ensures a realistic rebound experience.
Two Options for Creating a Practice Wall
There are two main options for creating a pickleball practice wall: a reinforced plywood screen or a plywood screen on a solid frame. Let’s explore each option in detail:
Reinforced Plywood Screen:

- Join plywood sheets: Start by joining plywood sheets to create a sturdy screen. Use plywood sheets of at least 3/4 inch thickness for better strength and ball bounce.
- Reinforce the edges: To reinforce the edges of the screen, use 2x4s. Attach them securely to the plywood sheets, ensuring stability and durability.
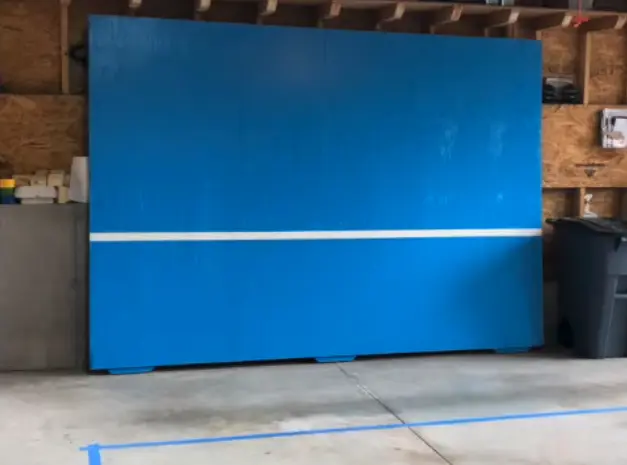
- Finish the front: To protect the plywood and enhance the aesthetics, apply wood putty to fill any gaps or imperfections. Then, apply a clear polyurethane coat to seal and protect the screen. Optionally, you can paint the front of the screen with bright colors to make it visually appealing.
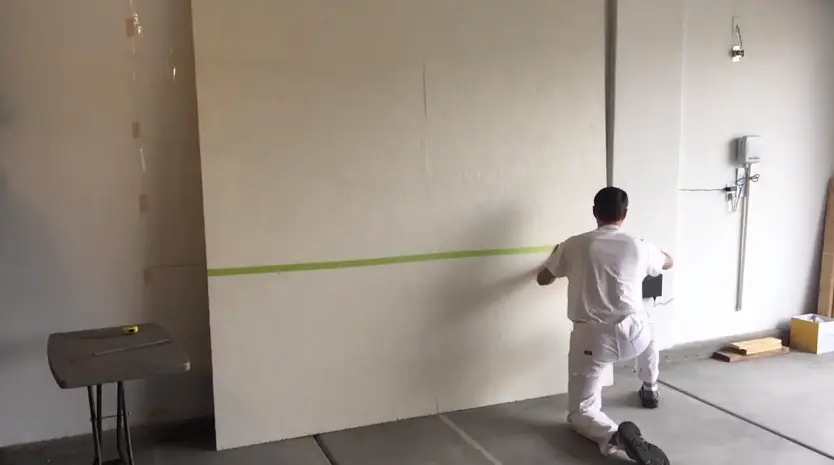
- Add a net line: For added authenticity, consider painting a net line on the screen at the appropriate height to indicate the height of the net.
Plywood Screen on a Solid Frame:
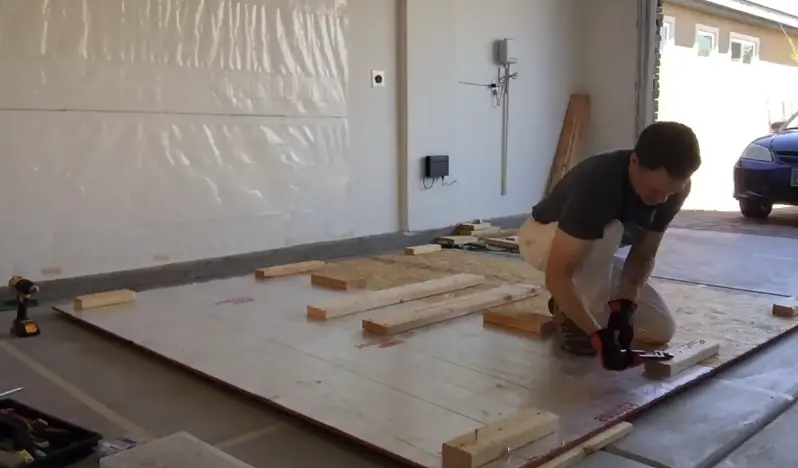
- Create a frame: Start by constructing a solid frame using 2x4s. Cut the lumber according to the desired dimensions, ensuring a snug fit for the plywood sheets.
- Attach the plywood sheets: Securely attach the plywood sheets to the frame using nails, screws, or construction adhesive. This will form the front surface of the practice wall.
- Finish the front: Similar to the reinforced plywood screen, apply wood putty to fill any gaps or imperfections on the front surface. Apply a clear polyurethane coat for protection and paint for an appealing look.
Setting the Angle of the Wall
The angle of the practice wall is crucial for simulating realistic pickleball shots. To achieve the desired angle, you can either lean the wall against a surface or use angle brackets to attach it to an existing structure.
Do Not Forget to Read: What Is The Average Age Of Pickleball Players
Ensure that the angle allows the ball to rebound naturally, mimicking the trajectory of a real opponent’s shots.
Benefits and Skills to Practice
Building a practice wall opens up a world of possibilities to improve your pickleball skills. You can use it to practice ground shots, serving, volleying, and various other techniques.
A practice wall made from plywood is cost-effective, easy to set up, and particularly suitable for practicing short hits around the non-volley zone.
However, it’s important to note that the ball may bounce down off the wall instead of up, limiting the simulation of opponent serves and groundstrokes.
Consider an Adjustable Pickleball Rebounder Wall
For those looking to practice deep forehand and backhand strokes more effectively, an adjustable pickleball rebounder wall is an excellent option. Building an adjustable wall requires additional effort but allows for a more realistic simulation of an opponent’s shots.
It provides angled rebounds, making it easier to practice different shot types. Additionally, an adjustable wall is often portable for short distances, allowing you to take your practice sessions wherever you go.
Materials and Construction Process

To build a pickleball practice wall, you will need the following materials:
- 2x4s (for reinforcement or frame construction)
- Plywood sheets (at least 3/4 inch thickness)
- Nails/screws (depending on the chosen construction method)
- Painters tape (for marking measurements)
- Paint or sealant (for finishing and protection)
The construction process involves the following steps:
- Gather the necessary materials, including plywood sheets and wood studs.
- Take precise measurements and make the necessary cuts for the plywood sheets and lumber, ensuring proper coverage and fit.
- Join the plywood sheets together and reinforce the edges using 2x4s for a reinforced plywood screen. Alternatively, create a frame using 2x4s and attach the plywood sheets to form a plywood screen on a solid frame.
- Use construction adhesive, caulk, screws, or nails to securely attach the lumber to the plywood and the plywood to the wall.
- Optionally, paint or seal the plywood for weather protection and longevity.
- Set the practice wall at an optimal distance from yourself, typically around 5 feet, allowing room for movement during drills.
- Adjust the angle of the wall to ensure a proper rebound trajectory and catchability.
Do Not Forget to Read: How To Keep Score In Pickleball
Incorporating Various Practice Drills
Once you have your practice wall set up, it’s time to incorporate different drills into your training routine. Here are some essential drills to focus on:
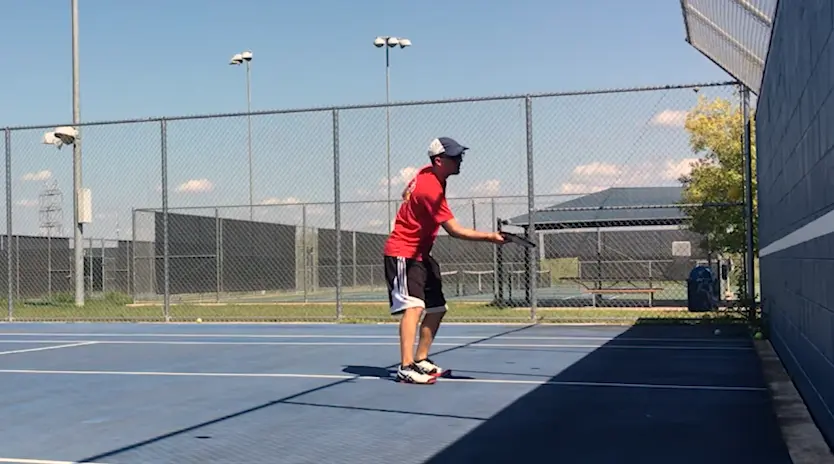
Volleys: Begin at the kitchen line and alternate between forehand and backhand volleys. This drill improves hand-eye coordination and reflexes.
Groundstrokes: Practice hitting groundstrokes from various positions on the court, focusing on hitting the ball out in front of your body and maintaining good footwork.
Dinks: Set up two horizontal pieces of tape on the wall to create a target for dinking. Practice hitting dinks straight on between the tape, paying attention to footwork and hitting out in front. Alternate between forehand and backhand dinks.
Speed and Power: Move towards the wall to improve hand speed and challenge yourself to move faster. Conversely, move away from the wall to practice shots with more power and distance.
Serves: Work on your serve technique by practicing hitting the ball out in front and above the imaginary net. Focus on footwork and a consistent toss.
Enhancing Your Practice with Solo Training Aids
To simulate real-game scenarios and add an extra challenge to your practice, consider using solo training aids such as rebounder nets or ball machines. These aids can help you develop your skills while practicing alone.
Improving Delicate Shots with a Shoebox
A shoebox can be a valuable tool for refining delicate shots like drop shots. Here’s how to incorporate it into your wall drills:
Delicate Dinks: Tape an empty shoebox facing upwards above the net line to create a target for drop shots. Aim to land the ball into the shoebox from different distances, practicing both forehand and backhand shots.
Control and Touch: Use the shoebox as a target to refine your control and touch. Mark additional lines on the wall to practice drop shots from different distances, simulating real-game situations.
Accuracy Training: Vary the distance and aim to land the ball into the shoebox to improve your accuracy. These drills with the shoebox can significantly enhance your drop shot technique.
Compete Against Yourself: Tracking Progress
Keep track of your progress by challenging yourself with specific goals. For example, see how many volleys you can do in a row without letting the ball bounce or measure the time it takes before the ball hits the ground.
By competing against yourself, you’ll stay motivated and witness your improvement over time.
Do Not Forget to Read: Why Are Pickleball Paddles So Expensive
Conclusion:
In conclusion, building a pickleball practice wall can be a game-changer for solo training, allowing you to enhance your skills and refine your techniques.
Whether you choose a reinforced plywood screen or a plywood screen on a solid frame, the construction process is relatively straightforward and affordable.
By incorporating various practice drills and utilizing solo training aids, such as rebounder nets or ball machines, you can further elevate your practice sessions.
Additionally, using a shoebox as a target for delicate shots like drop shots can help improve control, touch, and accuracy.
By tracking your progress and competing against yourself, you can stay motivated and witness your improvement over time. With a homemade practice wall, you can take your pickleball game to the next level and maximize your training sessions.

Michael Stevenson
Hi, my name is Michael Stevenson and I’m a passionate pickleball player. I’ve been playing the game for many years and I’m pretty highly skilled at it. Pickleball is one of my favorite topics so naturally, I love to write about it.
Whether it’s tips for beginners, guides for experts, reviews of new paddles, or advanced playing techniques – if it relates to pickleball then I have something interesting to write about it. So if you’re looking for entertaining and informative information on the topic of pickleball, look no further than my written works!